Wednesday 29 February 2012

Snakes and Curves

Time for a new Lollipop Ladies  challenge.

This one is all about those lovely chewy, juicy jelly snakes.  Who eats the heads first and who chomps on the tails first?  Go on, hands up! I'm a head girl myself - don't like the idea they might whip around and bite me before I get too far ;)


The additional challenge to this image is 

CURVES


My card based on a commercial blank 14 x 14 card from Big W; the DP used is from a Basic Grey Hullo Lucious Paper Pad. The card used is all Stampin'Up - Bravo Burgundy for the lace, Lucky Limeaid for the background and Whisper White for the stamped image. The lace is an SU punched strip. There is a scrap of yellow used too - not sure whose. The stamp itself is one I have had for a long time and got from the UK - not sure of the maker.  The ink used to stamp the image is Memento Black. I then stamped the sentiment in Tim Holtz's Distress Ink Tea Dye using a sentiment from Annabelle Stamps set All Things Grow, and used another SU punch to punch it out!  This is also used to distress the white card and other TH inks are used to colour the image using sponges and care! I used a technique I saw demonstrated on Stamp, Embellish, Create by the talented Kylie.  However, instead of using a crayon, I used the sharpened end of a small white candle to cover the faces of the children in wax, and to put in other places that I wanted to stay whitish. I then sponged the Distress Inks all over the image and rubbed it off the areas with the wax with a tissue.

It is finished off with some Annabelle Stamp Sprinkles and a bit of twine. The curves in mine come from the sprinkles and the lace strip, and the colours reflect those of the lucious jelly snakes!

I am entering this in the Annabelle Stamps Challenge for this week, which is a sketch!
As well, I am entering it into Celebrate the Occasion Challenge  - Birthday Card and
Colour Q challenge has the same colours I used so I will enter that as well!


I like the distressed look it has and the colours remind me of childhood (remember, mine WAS a long time ago!) .

Now, stampers - your turn. Why not make a card or item and enter it into the Challenge.  You have until March 15th to enter.  Do you good! Reminder: no digi's in this one. 

Tuesday 28 February 2012

My Hubby is wonderful!

Most of the time.

He has created for me a new cupboard - all off his own back and at no request from me - to house my computer tower and new printer and with some addition storage space for papers and things related to the computer!  See!


Before - with old printer and new storage space (white cupboards)


Now, with new white printer holder thingy, and desk hubby built for me 28 years ago. (Yes, I took that picture on the computer screen - its of Pompeii and Mount Vesuvius) 

Close up of computer stand
Now you know why today he is wonderful!

Monday 27 February 2012

Exciting News

I have been sitting on this news and wriggling in my seat for several weeks now just waiting to announce it and finally Suzanne over at Lets ink It Up has made it official - she has a new DT and guess what! I'm on the team!!!!  (Imagine lots of excited noises here!).  

My first contribution to the challenges is not until next week as there is still a few days to run for the last challenge, which closes on March 4th. Plenty of time to get an entry in if you haven't already done so!  To quote Suzanne:

As it is Valentines Day this month, so the month of romance, I thought

RIBBONS AND/OR LACE

that's romantic, don't you think


(It is sponsored by one of my all-time favourite stamp makers)


Bev has donated a prize package of


Remember NO DIGI images permitted here at LIIU.


Can't wait to get started on the March challenge - watch this space!

Saturday 25 February 2012

Heatwave

Today we are having a heatwave and therefore we have a bushfire! Scary messages over the national radio for the people in the area affected and  a huge pall of smoke over the city.  Temp has reached 39 degrees here and there is a fairly strong northerly blowing. AND we are not doing that well over the South Australians in the cricket one-day final in Adelaide, where it also as hot as here! Bummer! I have the reverse-cycle going full bore upstairs and it is quite cool in the house, and down here I have a large fan blowing over me so I am comfortable, but I went outside just a minute ago and the air is so crisp! My poor tomatoes are cooking on the vine!

I have two cards to share and will enter them in the following challenges:
Card Makin Mamas - Birthday cards (both cards)
CAS-ual Fridays - Puns (for the first card only)
Hotshot Craft blog - One for the Boys (second card only)


I was using Annabelle Stamps idea of creating your own backgrounds (but missed the challenge) plus I wanted to use a stamp set I have had for a while and only used two or three times - TJ Designs Poultry Party.  I also used SU Whisper White, and Marina Mist card and ribbon, and ink plus I used Crumb Cake ink as well. The punches were all SU punches as well. The card base is SU Kraft (or Crumb Cake). The string is from Annabelle Stamps. 

 The second card is for my BIL whose birthday is the 29th February! So this year he gets to celebrate.  We had to post the parcel so I made this in a bit of a hurry!  He is a photographer (more video these days) and without his camera there would not be many snaps of the children when they were young.


The stamp set I used is a new Dark Door one I fell in love with and had to purchase called Photography! The image of the lads is a stamp I have had for years and love, called Mariner Men by The Queens Dresser Drawers! Don'ch love it! I have use DP from SU and Papermania Kraft card to made the base, and SU Very Vanilla for the stamped images in . The inks are all either Memento or Tim Holtz Distress inks. It was distressed and layered as I tried to get a vintage feel. I was going to add some string but it got mailed before I could do that!


The inside of the card is sort of the same - but I do love this sentiment from the DD set. I thought it was suitable for a man whose birthday only comes once every four years! He turns the same age as his eldest grandson this year! Last birthday he was the same as his eldest granddaughter, who is turning 22 this year!

Tuesday 21 February 2012

Update on the boy

He's fine - back at school gaining much street cred, with his cast signed by everyone in the class. He was operated on on Saturday morning, and was most upset to find when he woke that as well as the left arm being in plaster, he had a canula in the right one as well - "that's my writing/drawing hand!".  Spent the afternoon at home laying on the couch and eating all his favourite foods, but by Sunday was being yelled at for being on the trampoline, had beaten his father in a Wi game and was insisting on going to school the next day! Oh to be six again.

Family seems to have recovered as well so all is well that ends so........

Friday 17 February 2012

UnstampaBelles midway through February

I quickly put together this as I was catching up with the progress of my grandson Jack (6) who has just gained a compound fracture of lower left arm (needs surgery tonight) from a fall off monkey-bars at school "I was trying to swing to the third rung and missed!" Oh joy!

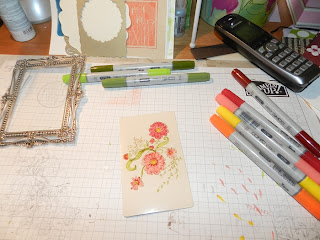
So, the card is made from SU Old Rose (discontinued) card, and utilises card from firstly the Merci Ornamental Frame pack - frame was stuck on this - and the acetate that the frame was originally clinging to - and the card inside the pack of Papermania Hamstead Adhesive Stones which had a lovely line drawing of some flowers. I colour the later with my copics and covered it with the acetate, mounted it all on the black card and then onto a card base made from the SU card.


Yes, that is a gin and tonic in the edge of the photo - I needed it!


Waiting for the call!


The packaging

Final product! Off the cook!


Fifty Six Years Ago

My younger brother and I were playing outside behind the fence on the farm.  We were playing on the wood heap, and yep, we were playing with the axe. He is younger than me by about 14 months. He always had to do things the way daddy did, and so the axe was lifted above his head - he was about 3; he dropped the axe of course, and as my right hand was in the way, I lost my index finger and halved (split) the middle one. I had an excellent surgeon who saved my hand and all but the index finger, and as I am right handed I have gone on to write, knit, stitch, operate a computer (indeed, teach keyboarding skills) and so forth for the next 56 years with little impact on my life. 

Now I have a problem with old Uncle Arthur (ritus) - who visits regularly and who has decided to warp my right thumb joint and draw the thumb around towards the palm. Doctors and physio's are talking operations, and my GP asked me today how I would manage the recovery period when my right hand would be out of operation for about six weeks - its beginning to look at bit close! I see the specialist in March - meanwhile I have a lovely (not) looking foam splint thingy I have to wear all day long - very fashionable! 

It hinders my crafting a bit - I am not as nimble and cannot use the scissors as much, but I am determined to use it and not lose it! So, I made a card yesterday for the Stamp, Embellish, Create - Tuesday Tutorial which was Faux Silk, presented by Sue Walsh at  A Consuming Passion.  Thanks for the great tutorial Sue - I did my best!  After I grabbed the lovely fawn tissue my Annabelle Stamps order was wrapped in, and stamped my image - I had a problem with getting a clean stamp there as well (you can see in the picture below), I tried it on brown and then off white card, and then tore a corner and then forgot to wrinkle it before fixing it, and then got one about right so made it do!


Everything except the image is Stampin'Up - card, paper and ink, ribbons and brads - but the image is Annabelle Stamps - Mother's Day Squared. 


The butterflies are die cut and embossed using Cheery Lyn dies. 

A few days ago I had a go at a layered card a lá Amazing Paper Grace! Her work is so amazing! I used mainly a die set that arrive last week called Spellbinders Shapabilities - Ornate Artisan Tags and Accents. The card and DP is from SU and that lovely bling is the new Kaiser Sparklets (yummy bling!). The sentiment stamp is from Verve and the ink used and backing card is Rich Razzelberry, and the green is my favourite Lucky Limeade. The ribbon is two different SU ribbons - same colour LL. 

Now, I need help here - should I have inked edges? made one layer a different colour? Made the base card bigger? What is needed here please because it doesn't quite do it for me. 


Wednesday 15 February 2012

Tiramisu and Layers

Today the Lollipop Ladies are launching a new challenge for the next fortnight. 


The theme will be tiramisu 
and as an extra challenge you will be asked to add layers to your card/item. 

After all, timamisu is a delicious, layered dessert. You can take your inspiration from the photo below! 


Doesn't that look so yummy! All that luscious custard, coffee, cream, chocolate, cake............a creation of C's!!! Oh yes, and Masala (or similar)! What crafter does not want to be involved with a good coffee, and some chocolate to help the creative juices flow!


Tiramisu means “pick me up” in Italian. It is usually made up of a layer of sponge fingers, which are soaked in coffee and some kind of liqueur. A layer of rich creamy Mascarpone cheese mixture is then laid over and finished with a dusting of cocoa powder.


Here is another photo of the desert:


Here is a link to a great recipe as well:

My contribution to the challenge combines some of these yummy colours and also remembers that February is the month of love and romance as well.  In addition, there are several weddings around that I need to get some cards made for and this one will kick off that collection. I will enter this for three other challenges as well:

Getting Cricky with K: wedding bells are ringing
Let's Ink It Up: #20 - ribbons and/or lace
CropStop #57: weddings

So, here is my entry:

I have used layers  (base card, DP, embossed card, mount, designable, lace motive and letters) and my colour scheme follows that of the layered scrumptiousness shown above. I have used the following items to create the card.

Cream Bazzill for the base card; SU Very Vanilla for the front card; mounted on firstly SU Kraft then Co'ordinations card in two different colours, which has been embossed and then sanded to show the alternative colours; DP from 7 gypsies Avignon paper pack. Dark brown Co'ordinations scraps behind the cuts in the cream.
Cream lace piece from stash; bling from Kaiser, colourd with Copics to match; Thickers - white Dear Lizzy, coloured with a Copic pen E49
Stamp: Lili of the Valley - Mr and Mrs; ink Memento Close to Cocoa
Embossing Folders: Provo Swiss Dots; Coulture Creations - Flamingos and Hedgehogs; Marianne Designables - DS0911

The image has been subtly coloured with Copics and Spica pens were used to create a bit of sparkle on the flowers, and the veil and the dress. The image was stamped and punched out and fitted into the space with dimentionals to lift it up - such a bonus when I discovered one of my circle punches fitted perfectly the circle in the Marianne Embossed Designable. I used SU Sizzix adhesive sheet to fix the lace to the card and eventually Crystal Effects to fix on the bling!

(Bugger - I have just noticed that one of the bits of bling had fallen off the card in the photo - now fixed on the card!)

Thursday 9 February 2012

Off to Uni

My eldest grand-daughter is off to Uni soon - and she is turning 19 on the 10th! she took a Gap Year between College and Uni and is ready to go back to study now to be a primary teacher! Here is the card I made her. I am going to enter it in a number of challenges and as I know she does not read my blog that often I will chance it that she does not see it before she gets it!

The stamp is a Sparkles image called Cocktail Emily.  I used Copics to colour her in. The sentiments are a mixture of WMS and Verve stamps.


The dies used were Spellbinders Nestabilities and Die-namics numbers for the 19, and for the paper lace strip. The tag is a Sizzix die.  The hearts were punched from SU Poppy Parade.  The background is sponged in Memento inks - Summer Sky and New Sprout. The bling is from my stash and is probably Kaiser. The card used is all SU (Poppy Parade, Pink Pirouette and Bashful Blue) except for the one the image is on, as this is XPress Blend-It and stamped with Momento Tuxedo Black.  The inks used for sponging the edges was SU Poppy Parade and Soft Suede, and the latter was used for the sentiments.  The background paper is from Basic Grey's Out of Print. The is sparkle added with the Spica pens but its a bit hard to see in the photo. 


This is inside it - The stamps used here are from Verve. 
The challenges are:

CR84FN #47 - Pink, Red and Light Blue
Cropstop #56 - numbers (may have missed this one)
Annabelle's - Say it with ....Hearts (with033)
Papercraftstar #83 - Hearts

New Dies

Don't you love it when the post delivers little bags of goodness from all over the place! Yesterday I got some new dies and today I got some new rubber! Show you that later - the dies got a run yesterday afternoon. I have been looking at this for a while and then got it but don't really know what to do with it.  I will need to play around more - this was just the initial cut to make sure they worked.  The dies are steel ones from Memory Box. 


SU Whisper White card folded to make the base. SU Lucky Limeaid for the canopy and Kraft for the tree.  The bird is chipboard from the stash, coloured up with white gel pen. The sentiment is stitched on (yes, I threaded a needle!) and is from my stash from so long ago I cannot remember where I got it. Ribbon is SU and the brads are too.  The sun is a 1" circle punched out of SU Summer Sun and sponged with SU Apricot ink to make it look more dramatic. I also sponged Memento Summer Sky ink around the tree and SU LL ink around the edges of the card to create a border.

I am going to enter it into Die Cuttin Divas.  Challenge #51, except I turned it around.


Tuesday 7 February 2012

Experimenting....

....with inks is interesting. Some experiments are below.  You see, I got a new mask in the mail from Prima. 'Nuf said?  Then, Andrea at Annabelle Stamps has opened a new web site called Stamp, Embellish, Create and you are all invited to join.  Well, she is having a play with Distress inks in her first Topical Tuesday Tutorial - you watch the video, and then have a go yourself and upload the result!  Mmm- so I had a go and CASed her card and here it is:


Too bright? The image is one of Annabelle Stamps from a set called Sentimental Bluebells but my flowers are pink because I know they come in different colours, I grow them in my garden! I used Distressed Inks - Scattered Straw, Faded Jeans and Forest Moss sponged onto the stamp to stamp it, and the sentiment (same set) is just stamped in Faded Jeans.  I used Rangers Raspberry alcohol ink to make the middle background and then picked up some of this colour from the sponge with a paper Stix and used that to put some colour into the bells. Card is SU Whisper White and the ribbon is from the stash.

Now the other experiments:


This is the mask and the various sprays used to colour the paper


The one below used some of the Distressed inks I have


Then I tried chalks (below)


And then I gave it a go with the brayer and SU ink


Haven't done anything with them yet -still cogitating! 

Monday 6 February 2012

Cheese Boxes....

...come in handy.  I wanted to make a special something for a granddaughter who hasn't been that well lately - so I trawled through the trash and treasure I have stored in my workshop and found an empty cheese box made of balsa wood and made this! She loved it. However the trawl made me realise how much junk I have so I have had a clean out and purchased two more storage cupboards (hubby is putting together the second as I type) to hide the treasure and create a little order!
(Sorry - thought I had scheduled this to go live this morning (Monday 6th) but didn't work-aaaak!!!)
 Recycle, Eco Craft: Frugal bonus technique  - make and add a Paper Bead. 

WARNING: Long post, so you might need to grab a cuppa first!


I have made it for Unstampabelles new challenge for February (see details below):

I will also enter it into:
Gingersnapcreations Challenge - words of wisdom (I have them inside on on top)
Stampotique designers  - altered item (a cheese box)
Whimsy Stamps - make your own flowers (yep!)
Aud Sentiments - anything but a card sentiment (It's not a card!)


The prize for this months challenge is from Cardmaking Online.  The Challenge starts today and runs until Friday, 2nd March - so get creating!


Cardmaking Online has been running for two years and offers a large range of card making products, including Parchment Craft, European style card making, card stitching, 3D Decoupage, embossing folders and dies, Hobbyjournaal magazine, card stock, peel-off stickers and more.


The Prize: 


(I have added a tutorial on making paper beads at the bottom of this post)

This is how I made the box:


I took the balsa wood box and painted it with some watered down gesso (white) as I wanted it to be off white in colour although I knew a lot would be covered up.

Here is a contrast - yes,we eat a lot of yummy cheese, especially over Christmas!


I got some old My Minds Eye Bohemia - Pretty Little Girl 12 x 12 from the stash and cut out the circle to fit the top of the box, using my SU Scissor Circle.  I cut two strips to fit around the edge and used Tombow glue on the top and double sided tape on the edges to attach them and then filed them with sandpaper to make them fit properly. This gave them a bit of a vintage look as well. The sandpaper disc is on the right (flower shape) and the glue rubber (eraser - essential when using Tombow for me as I get it everywhere!)  is on the left sitting on the double sided tape.


I found an old rub-on in the bottom of the rub-on drawer by I think Sandi Lion, but maybe not... and using the bone folder I finally got it to release and sit in the bottom of the base. In the top left (scissors handle area) you can see the wooden bird cage and birds I used.  They were purchased in Melbourne at Blackburn (PaperArts Bellbird) and there is no makers name on the pack. I sprayed them first with Tsukineko's Walnut inks -Willow and Lilac; and then with a top of Moon Glow's Gossamer Gold mist from The Stamp Gang


Then I fiddled with stuff until I had an idea of how I would place them - the epoxy sticker came from the pack on the left from Cloud Nine.  The flowers are two I  made earlier and I simply cut three leaves and stem from a Sizzix die from SU in SU Lucky Limeade scrap card. I put a piece of this card under the epoxy sticker as well to  highlight it. The lace was laying around on the desk - its from SU as well. At this time I noticed I had to do something about the bottom layer edge of the box as well - I didn't have enough Bohemia paper left so I found this strip of sticky 'ribbons' in the stash drawers (you can see it about 1-o-clock) -again, no idea where it came from but it matched! 


The next day I decided it needed something else, and added a scrap of purple ribbon that was also just laying around. I then took it outside and tried to photograph it and get the sparkle going! I had sprayed all of  it with a home-made gold mica spray the night before. It really does have a subtle sheen going on!


You will notice that the first photo above shows two home made paper beads added: I  re-read the Challenge you see, so made two beads and added them with gold embroidery thread - I have since shortened these threads as well so the beads only just hang off the ribbon. 


Hope you like it!


Paper Bead Tutorial:


1. Cut a strip of paper as wide as your bead (around half an inch or 1.5 cm) and as long as required.  Here I have used a piece of Japanese paper original sheet size is 15 x 15 cm


2.  If you want your bead to be bigger in the middle, and skinny on each end, cut the paper strip in half, beginning in the corner of the strip at the top and ending in the opposite corner at the bottom. If you want a blunt look, do not cut the strip.


3.  Using double sided tape or glue gun, or similar, attach ribbon or twine to the top inside edge of the strip.  In other words, the opposite side to the one you want to appear on the outside of the bead. Make sure the ribbon is at right angles to the end of the paper.


4.  Now using tweezers or fingers if you are nimble, simple wind the paper strip tightly until to you get to the last 3 cm or 1".  Now put some glue or similar onto the inside of the paper and continue to wind until the paper is completely wound up and glued. I used SU crystal Effects as my glue or sometimes Tombow.  Remove the tweezers carefully.  Let the glue dry. You have a bead dangling off a ribbon.  If you just want a bead, skip step 3.